
The Menus of Gate of Providence Remake
The Menu
This blog post is about the menu screens in the Gate of Providence remake. As an RPG, menus are a thing players will have to navigate frequently so it's important to design them to be functional but also interesting. For the remake, I aimed to keep it minimal while displaying all the necessary information. I decided to write my own main menu plugin to suit my needs. Many of Yanfly's plugins are also used, though modified to fit with my own design.
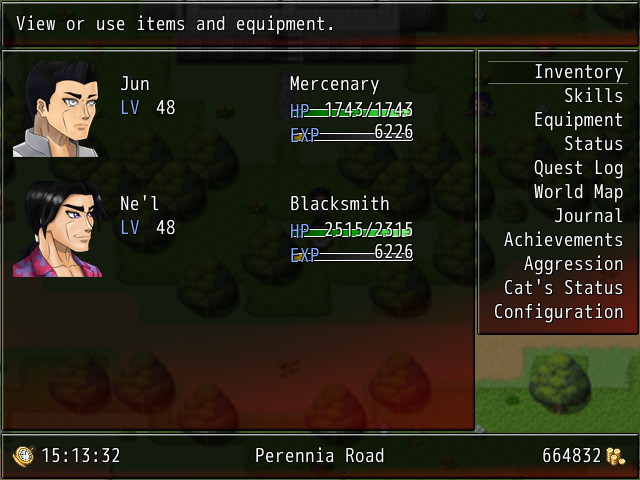
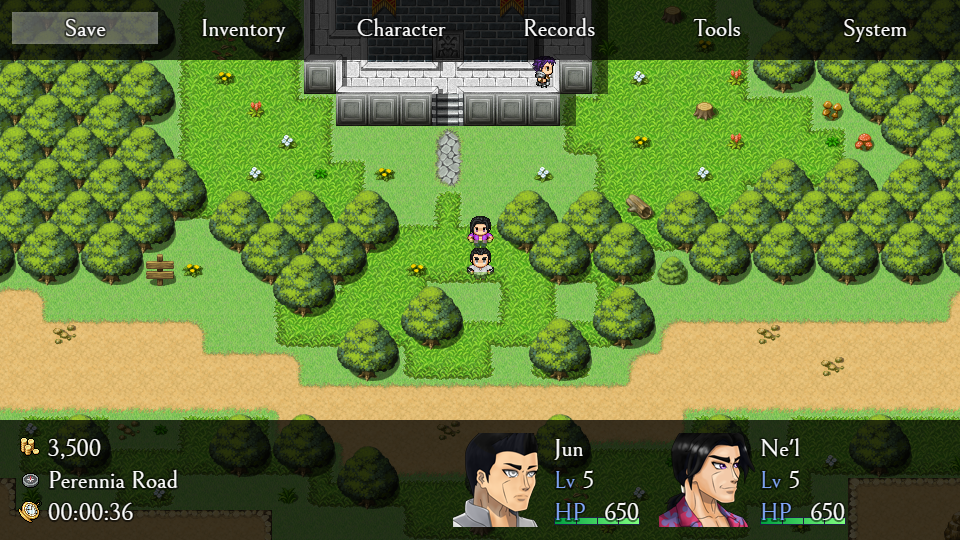
Old and new, side-by-side comparison.
One of the first things you'll see is that the new menu is a lot more "open", especially with the increased width of the screen. The original status window and data window (gold, location, time) took up nearly 80% of the screen, with lots of wasted space. This was condensed to only take up ~25% in the new menu. The help window was also removed, as the menu options are relatively self-explanatory and don't require description.
The menu commands have also been condensed. Similar commands were grouped together into categories, which are accessed through sub-menus. Skills, Equipment, Status were moved into the Character category, as all of them require selecting a character before moving into the next menu. Quest Log and Journal go into Records, and Achievements and Configuration went into System. Technically, Save could have been in System as well, but I chose to keep it outside for easy access. I ordered the commands so that the most frequently used commands are accessible in the least amount of actions.
Inventory
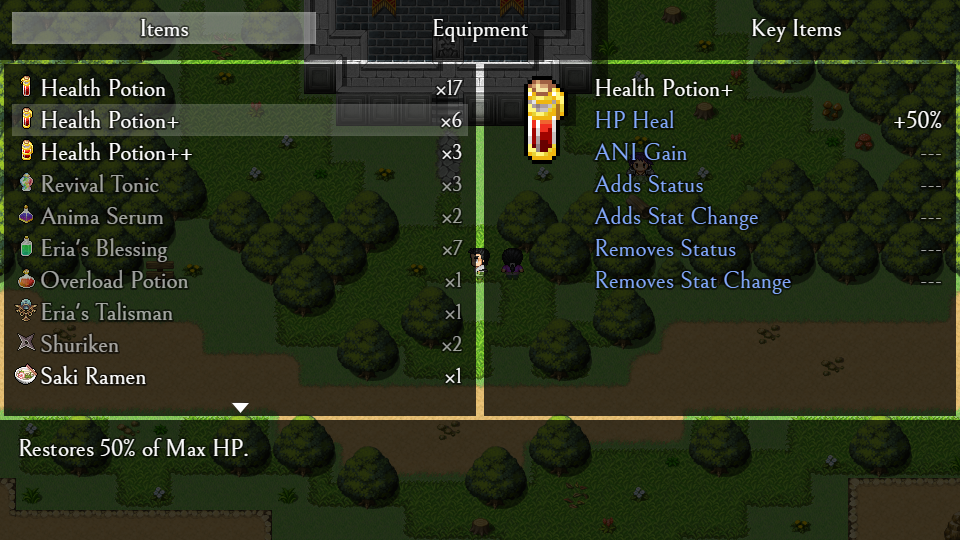
The inventory screen, with Items selected.
This menu screen is built on top of YEP Item Core. The top and bottom vignettes are retained from the main menu to keep a consistent design, with the top showing commands, and the bottom showing the help window. The info window from YEP was removed because it contained no relevant information and wasted a lot of space. I put the status window in its place and expanded it.
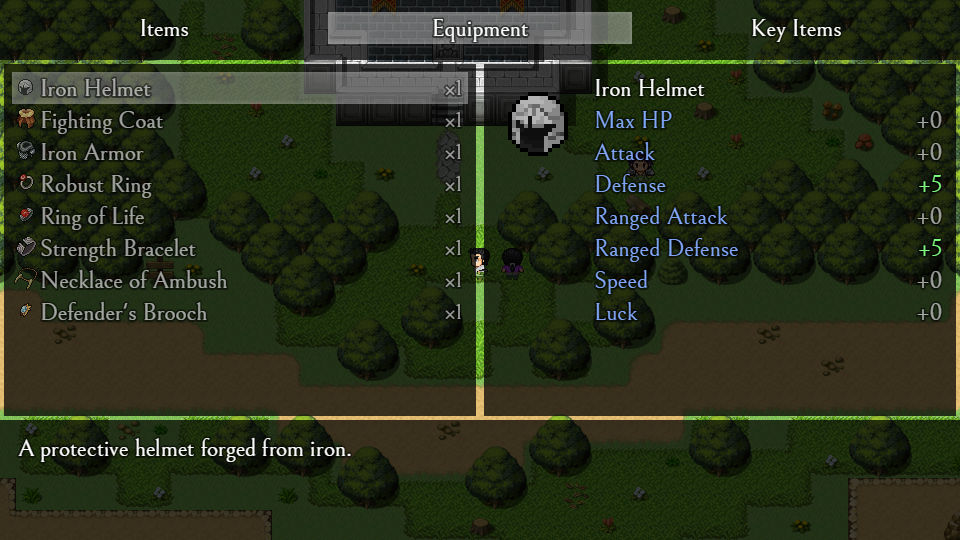
The inventory screen, with Equipment selected.
The Equipment option is similar to the Items option, except the status window shows the stats of the selected equipment.
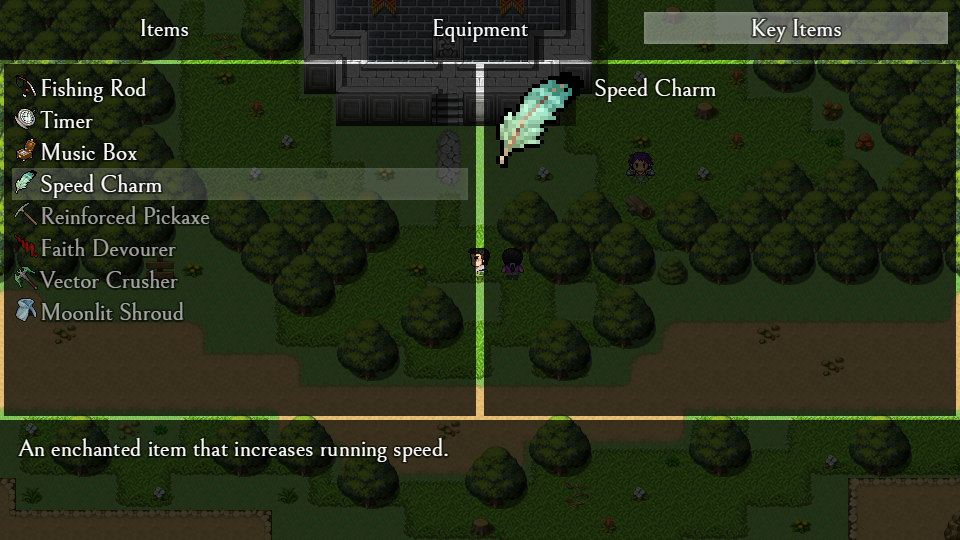
The inventory screen, with Key Items selected.
The Key Items option is more barebones than the others. It keeps the same design as Items and Equipment so the status window is there, but information like stats or status effects have been removed as they are not present in any Key Items. Usable Key Items like the Fishing Rod are placed on the top of the list for easy access, though they are also accessible through the Tools command in the main menu.
Character
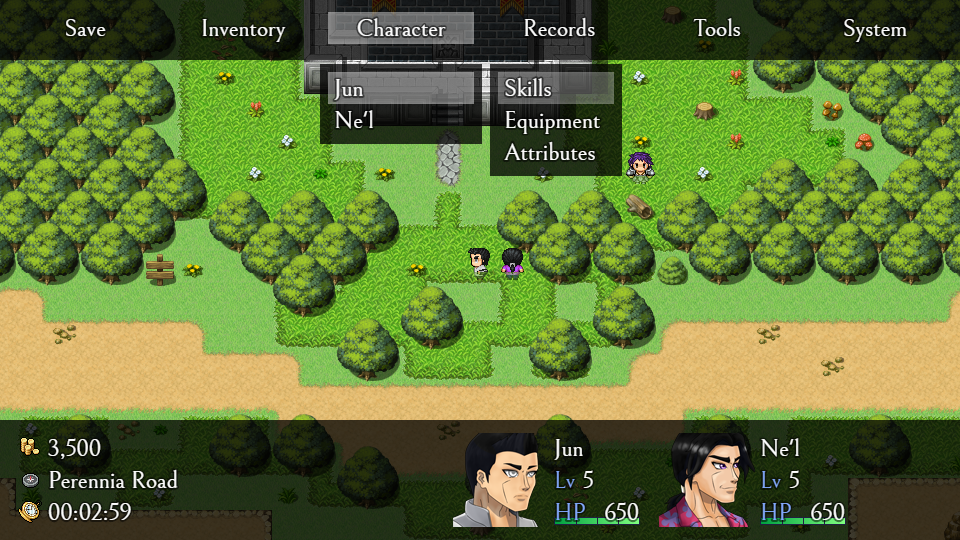
The Character Command with a sub-menu open.
Selecting the Character command on the main menu will display a list of the characters in the party. Selecting a character will open a sub-menu that has Skills, Equipment, and Attributes. The Skills screen is very simple so I won't show it here.
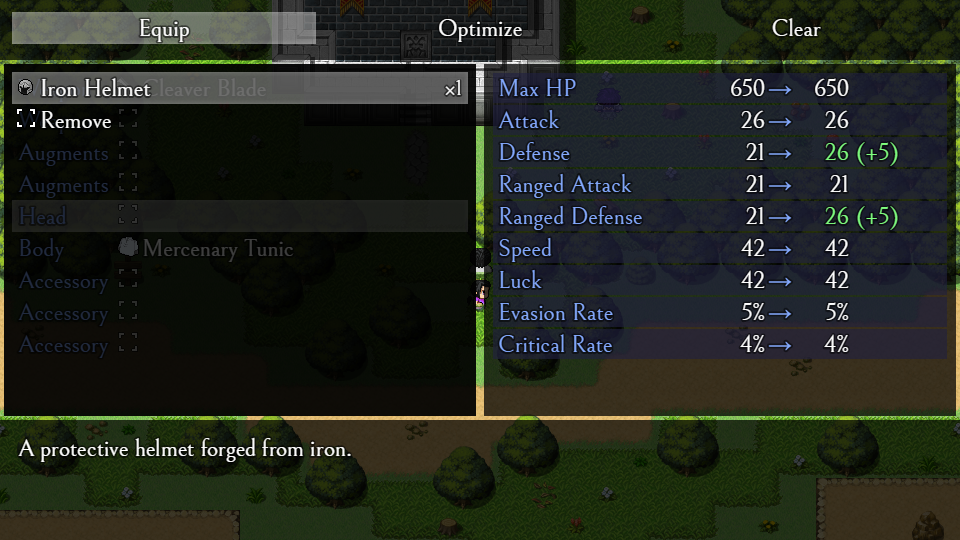
The Equipment screen.
The Equipment screen is built on top of YEP Equip Core. As usual, unused windows were removed and the parameter window was expanded. I also added Evasion and Critical to the parameter window. Also note that the names of the parameters were changed - I felt that it was best to be as clear as possible when it came to naming. Names like Strength or Endurance sound nice, but it could be hard to remember what something like Endurance actually does. The names were changed back to what they really do - Attack and Defense, Ranged Attack and Ranged Defense, with no ambiguity on what interacts with what.
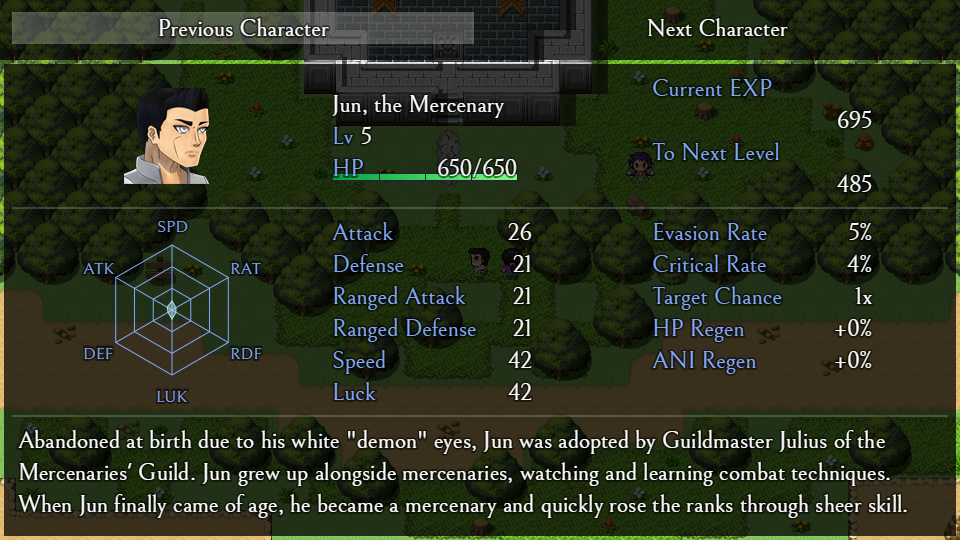
The Attributes screen.
This screen deviates from the original Gate of Providence a bit. This screen was built on top of using mjshi's Stat Polygon, which draws a radar chart. A fancy visual helps players quickly distinguish strengths and weakness of each character in the party, as well as see how close they are to a character's maximum potential. More stats are listed, adding Evasion Rate, Critical Rate, Target Chance, and HP/ANI Regeneration Rate. With all the space saved from the original version, I was also able to fit in a short biography as well.
This is also a second variation on the main design, which only keeps the top vignette. I use this design for screens that need to display a lot of information and don't use a help window.
Records
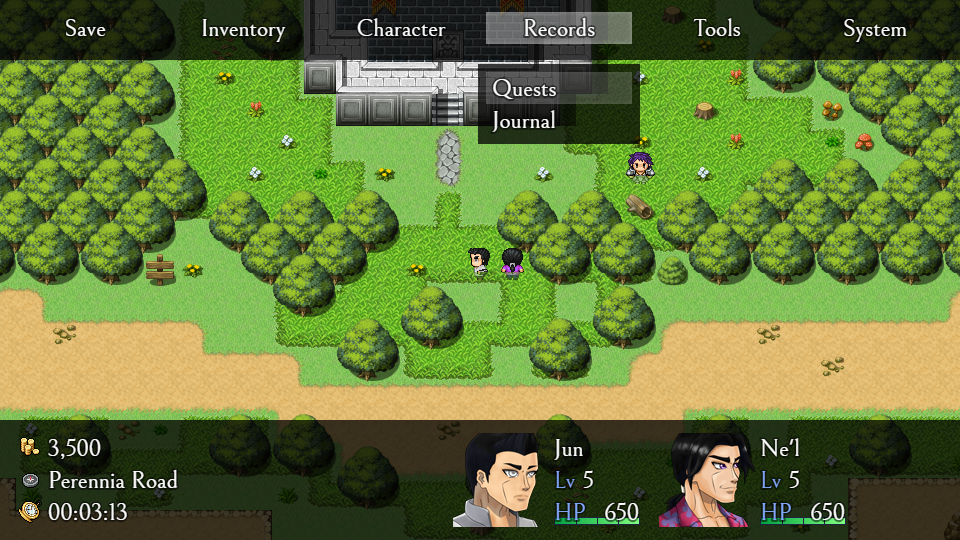
The Records Command.
The Quest Log and Journal were moved to Records. I'm considering also moving the Map here as well.
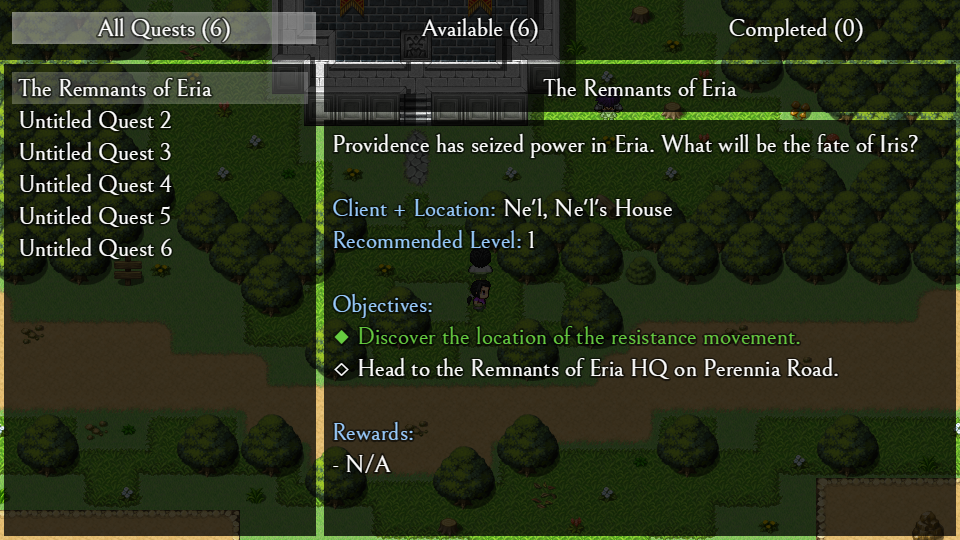
The Quests screen, with placeholder quests.
The Quests screen is built on top of YEP Quest Journal System. I used the second variation with the top vignette to give more space for the quest list and quest description. In the final version, all quests will be displayed from the start. This screen can also be brought up by hitting the "A" key on the map.
On another note, Yanfly is seriously amazing for the MV scene. So many of scripts used in the original GoP had to be sourced from many different people, while in the remake, Yanfly had made nearly all of them, which is very good for code quality and consistency.
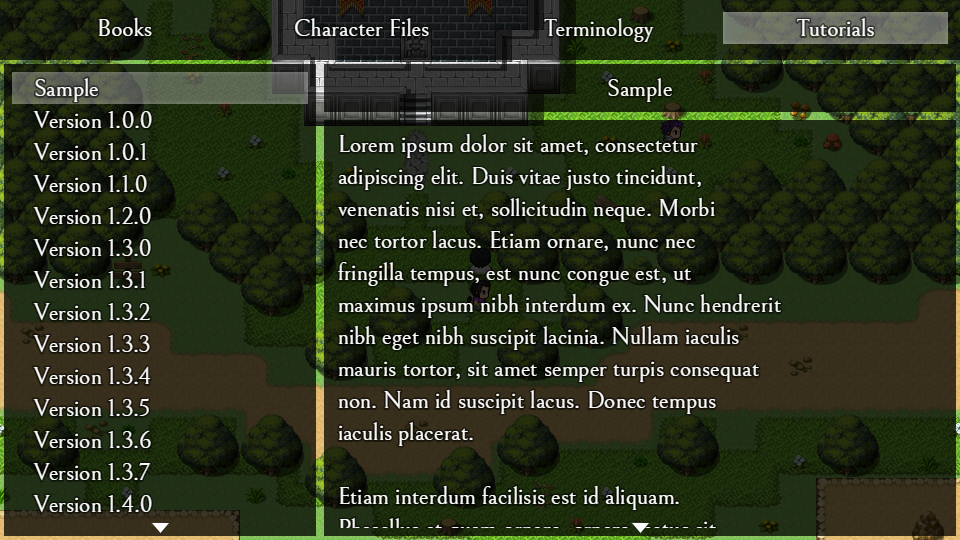
The Journal screen, with placeholder entries.
The Journal screen is built on top of taaspider's Book Menu, which was based on YEP Quest Journal System. (And comes with the same bugs, no pun intended!) It functions pretty much exactly the same as the Quests screen, except it displays stuff like Books or other miscellaneous reading material.
System
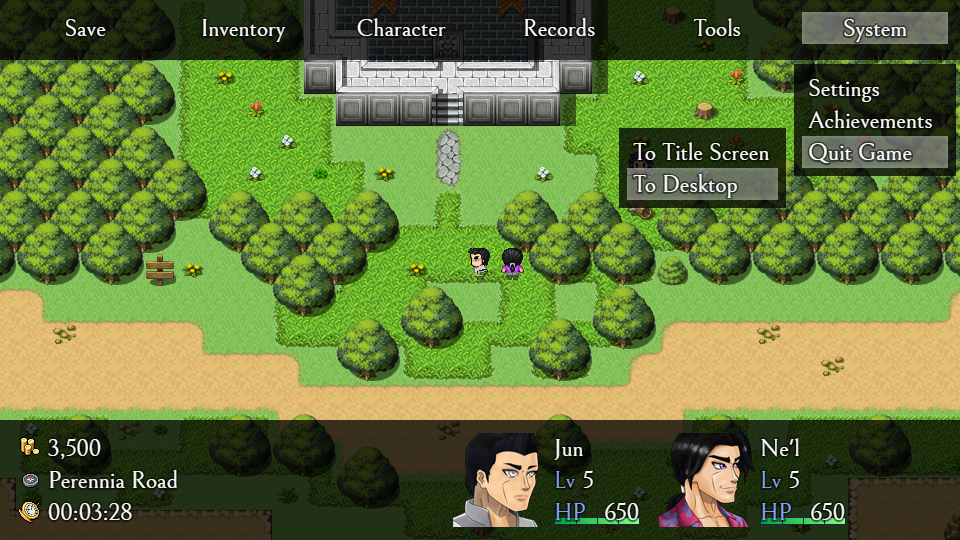
The System Command, with a sub-menu open.
The System command is where players access Settings, Achievements, and Quit Game. Previously, Quit Game was tucked into Configuration which was sort of an odd place to put it. The sub-menu is also shown in action here, which circumvents the GameEnd scene entirely.
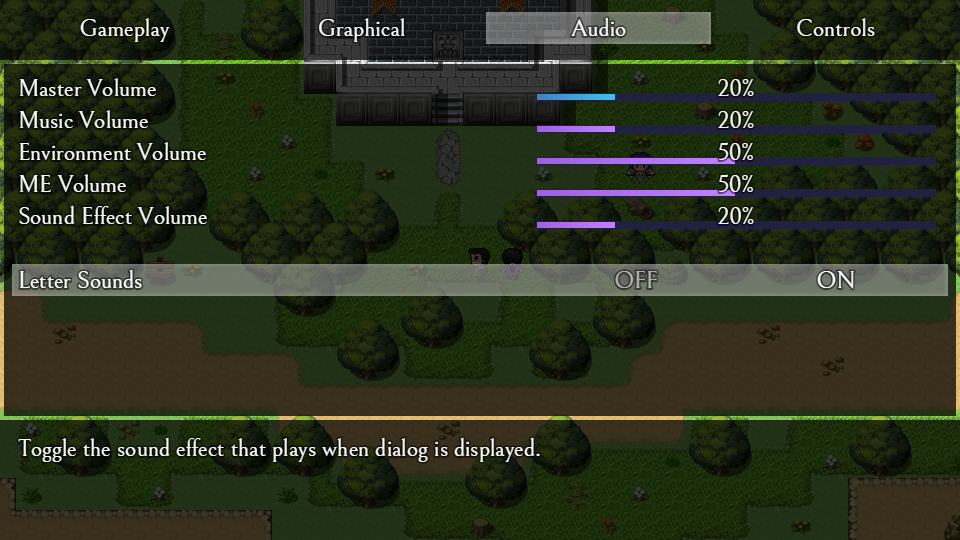
The Settings screen.
The Settings screen is built on top of YEP Options Core. It's a fairly standard settings screen, though I'm planning on putting plenty of toggles so players can customize their gameplay experience. Players can also change their keybinds in the remake, unlike in the original which had a strict control scheme.
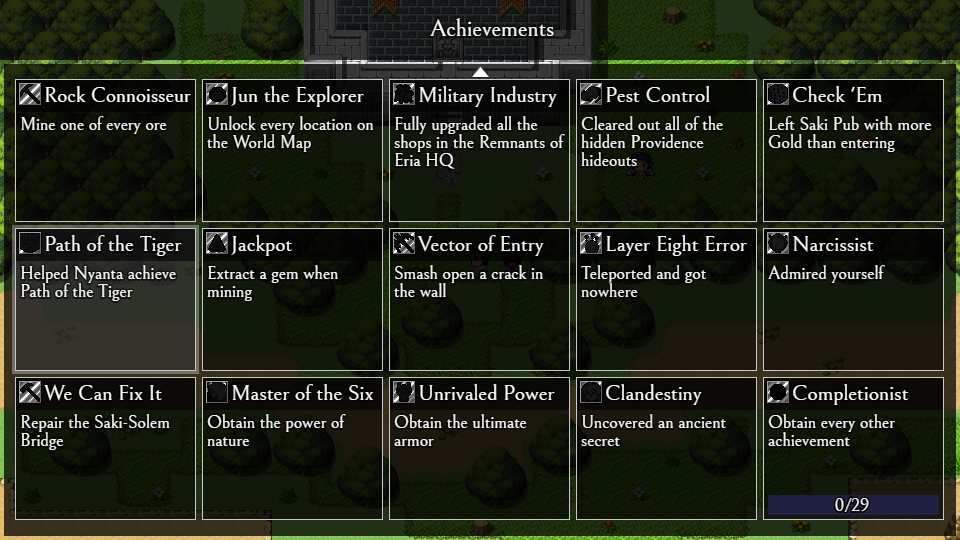
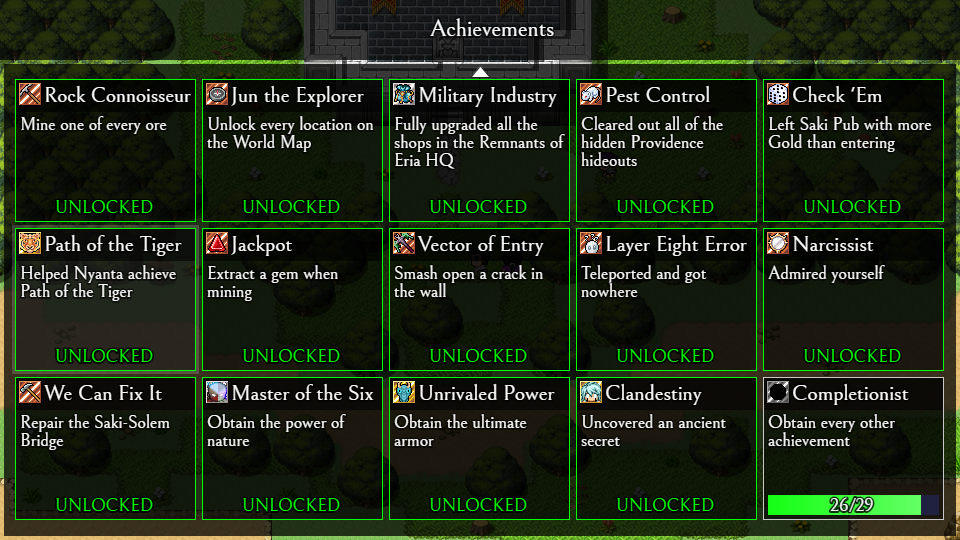
The Achievements screen, with locked and unlocked achievements.
The Achievements screen is built on top of SMO's Achievements. I liked their plugin the best out of all the other achievement plugins out there. It also had a lot of fluff, but it was not a problem since it was easy to delete.
The number of achievements were also reduced to 30, from 40 in the original. The deleted achievements were mostly progress-related, too grindy, or just made obsolete by change in design. The current achievements are not entirely finalized yet, so the ones shown here may be changed later. The icons were also changed to indicate tiers like with Playstation trophies. The achievement ratios here are 50% (15) Bronze, 30% (9) Silver, 16.7% (5) Gold, and 3.3% (1) Platinum.
Tools
Nothing to show here actually. The Tools command just brings up a small "Use Item" window, which lets players pick out a Key Item to use. I use this for quick access to tools like the Timer, which can be used to check up on the pet cat. Players using the keyboard can bring up this menu by hitting the "S" key on the map, but it was added to the main menu for mouse players.
Other Updates
So, that's all for the menus for now. Other things I've done beside the menus so far is reorganizing the Iconset as well as culling items. There were a load of pointless consumables like Antidotes that were so situational that they didn't really need to exist. Many items were consolidated, like buff potions, stat growth salves, and debuff flasks. In addition, new icons were assigned to many items and status effects.
My next goal is to clean up and reorganize tilesets. Currently, there are a lot of tiles that are unused, and some tilesets are taken from the original resource asset in its entirety. Most of these are outdoor tilesets, as I had already made my own arrangement of interior tilesets in the original. Once that is done, I can begin making the maps and piecing together the explorable world.
That's all for now. Thanks for reading!